Pages

Monday, July 30, 2012

Made 4 Math: Project Time Capsule

Today's #Made4Math project is new to me!  I designed it to reassure my students in "CoLLeGe MaTH" (which sounds scarier than it actually is) that the class is actually so do-able!  I'm calling it a Mini-Time Capsule Project in which students draft a welcome letter and leave an artifact for incoming classmates to open on the first day of school the following year.  This year's students will use index cards to record first day thoughts, their anticipation prior to Test #1 and reassurance after receiving a graded Test #1 back and then, use the notes to pen the letter filled with advice and encouragement.  Here is what I have put together:

Poster for the New York World's Fair 1939
The term 'time capsule" was coined by organizers of the 1939 World's Fair held in New York City though boxes filled with memorabilia were buried long before then.  For the World's Fair, the event planners proposed to bury artifacts and information that would not be opened for 5,000 years. Time Capsule I was  constructed by Westinghouse and filled with contents that captured American life as it was in 1939.
Your task is to create a mini time capsule of sorts for the advanced math student who will sit in your desk next year.  Your time capsule which can be an envelope or small container of your choosing should be filled with a letter addressed to the student and at least one artifact that represents you.  In your letter, you will use proper grammar, punctuation, and letter format to convey your "First Day" thoughts about the Dual Enrollment class, feelings leading up to the first test, and study tips and strategies after you receive your first test grade (don't worry, you will do great on the test!).  Your letter should be reassuring and encouraging.  It is your opportunity to help put an underclassman at ease.  You are actually leaving a bit of yourself behind through this project, so be thoughtful in your wording and in deciding which artifact(s) to place in the capsule. 

Letter Specifics:
You will write a letter welcoming an advanced math student to the class using a ‘friendly letter format’.

Your letter should contain:

  • Heading
    • Omit the address and just place the date in the upper right corner.
  • Greeting
    • You may use “Dear New DE Math Student,”
  • Body - 3 paragraphs (each indented)
    • 1st paragraph: Welcome the new student, share something about yourself and your "First Day" feelings.  Be sure to identify 3things you were thinking on the first day and why.
      2nd paragraph: Answer a possible question the new student may have and describe your thoughts leading up to the first test and after taking the test.
    • 3rd paragraph: Politely wish them a good year and possibly add a line of advice, study tips, or strategies.
  • Closing
    • You may use any appropriate closing of your choice.
  • Signature
    • Rubric
    • If you choose to type your letter, please sign it after you have printed it.
For my class, it will be a letter, but a mini-time capsule can be filled with anything to capture a moment in time to be shared with others at a later date.  Hopefully, you will be able to take what I have created and adjust it to meet the needs for your subject and your students.  I can't wait to see what you do!


**Update: We have completed phase 1 of the project.  On the first day with students (I had them for 10 minutes) the kids wrote down the first three thoughts they had when they thought of "College Math".  I loved, loved, loved the feedback!  As I read through the notes they wrote on index cards, I found it helped me understand each student better.  I will definitely do this again and I am eager to see the completed project in the upcoming weeks.

Friday, July 27, 2012

Fabulous Finds Friday: Pinterest, Partying, and Teaching Strategies

My Fabulous Finds this Friday all revolve around connecting with others, specifically fellow educators.  Gems include hosting a Pinterest Party, sharing pinteresting ideas on an "analog board", and reaching and teaching through a variety of strategies.

Last month, I read The Clever Pink Pirate's post about hosting a real life Pinterest party.  She invited crafters, bloggers and friends for an informal gathering to try Pinterest inspired recipes and crafts.  I loved the party theme.  I thought this might be fun to try at work, maybe before school starts, where colleagues could get together and make the teacher binder or bulletin board that was pinned in early June:) For me it is not so much about getting more stuff done, but spending time with friends I haven't seen all summer! 

Analog Pinterest Board
Second idea...more Pinterest, more connecting.  Mr. D, blogger and future Pinterest user, posted a picture of his idea of an "analog pinterest board".  The picture cracked me up, but reaffirmed an idea I had for creating a real "analog board" for our faculty lounge.  There are several teachers at our school who are pinning and while we enjoy finding inspiration for our homes or our next party, we also are busy pinning ideas for our classrooms, educational technology tips, and helpful sites for implementation of the Common Core.  After a summer of prolific pinning, I wanted to share some of our best ideas with my non-techy friends. So, of course I had to create a board that would be Pinterest worthy (okay, maybe that's a stretch, but it had to be more than a chalkboard with scotch tape:).  As we find new ideas, games and activities, I am adding them to a Publisher document.  So far, I have one page (for Week 1) with four pictures on the page. I've printed the pictures along with a blurb about the "pin" and posted pics on the "analog board". I've invited others to share their finds too.  Hopefully, this will foster collaboration and communication  among many faculty members, not just those who are already online.  I am hoping to continue adding at least four pictures a week to the Publisher file.  At the end of the year, I will print the 36 page document (1 page representing 1 week of the school year) and place the collection in a binder for our teacher resource center.

My last find is a fantastic post on Edutopia by Monique Flickinger filled with 10 great ideas for sharing with others.  While Monique is responsible for teaching almost 1500 teachers technology, most of her strategies could be employed by any educator.  She suggests:
1) Show, don't tell. Create a 3 minute video that shows teachers in action using a new technology (or classroom management strategy, or teaching technique).  Teachers could create videos starring students who are solving challenges, explaining content, or demonstrating a procedure.
2) Teach with TV. Produce a 20 minute monthly show to be broadcast on your district, school, or class website.  This could feature any teaching strategy for PD purposes or in the classroom, serve as a longer review for students who need to see things explained in a variety of formats or multiple times.  No TV station to host your broadcast? Use U-Stream to broadcast your own online show. 
3)  Be "liked". Monique's department has created a Facebook page where they post weekly updates on new technology, pictures of classes in action, and share updates.  This would be a perfect way to connect with teachers or parents after hours.
4)  Chirp about your accomplishments. Twitter has become an invaluable tool for me to connect with others and learn from them.  I call it PD in my pocket, because all I have to do is open the app on my phone to learn something new.   @TeachTechPSD tweets twice a week to inform teachers of timely information. Teachers might invite parents to follow a class account on back to school night.  It would be an easy way to remind families of upcoming assessments, project due dates, or changes in the schedule.
5) Blog about it.  Monique suggests sharing teacher tips twice a week in short posts that can be processed quickly by readers .  For her team, their posts are about technology, but a content coach might share about the Frayer model or a foldable idea for a specific unit; a student might update the class blog with a reflection on current content.
All of the ideas are wonderful and could be implemented by anyone wishing to make content accessible anytime and any place. Want to know the rest?  Check out the complete article on Edutopia!

Monday, July 23, 2012

Made 4 Math Monday: Week #3 for Me!

It's another week of two #Made4Math projects in one post, one is crafty and one is  math-y, but both are much needed for my classroom.  Project #1 was inspired by Shey B's fabric tape. While I don't need fabric tape too often in the classroom, I do need bulletin board border that doesn't rip.  I have a board just outside my door that I struggle to keep looking fresh; no matter what I put up, it always appears a bit tattered after just a few days.  So, in this #Made4Math project, I purchased generic border at Dollar Tree and Wonder-Under (fusible web) and fabric at Hancock Fabrics (who happens to give teachers a Red Apple discount of 15%).  I started off with only two fabric choices, but there were so many beautiful pieces that I am sure I will visit again soon!

The border came in very short strips, so a measured how much I needed for each side of the board and then used packing tape to secure pieces together to create the desired lengths.  I used an iron to fuse the Wonder Under to my fabric and then cut out pieces to cover my border. 

I left 1/2" - 3/4" of fabric on each side to wrap around the border's edge.

I finished the ends by wrapping the fabric around them like a package and ironing the material down.  I placed the patterned side of the border toward the back, because the bright colors were showing through the fabric on the first try. 

It was quick work to have border that will stay fresh and crisp in a high traffic area for years to come!


Project #2 stems from anticipation of the new iPads scheduled to arrive next month and focuses on defining a task, providing a tutorial, and developing a rubric for the creation of math videos using the new technology.  In this activity, students will assume the role of an online course developer and create a screencast using the Educreations app.  I choose this app over Screenchomp (even though I met the app developer at Mobile 2012 and loved him!), because I was never able to successfully get Screenchomp to upload my recordings.  Educreations was easy to use and 100% reliable in uploading and sharing my work.  Here's what the students will see on the class website:

Overview: "For the past nine years the Sloan Consortium and the Babson Survey Research Group have taken a look at the state of online learning in the United States. The 2011 survey reveals that the number of students learning online has now surpassed six million, with nearly one-third of all students in higher education taking at least one online course.  Last year’s annual survey revealed the largest ever year-to-year increase in online enrollment since the study began eight years ago." - Going the Distance  

 "Online learning has numerous benefits, including expanding course offerings, customizing and personalizing learning, giving struggling students a second chance to master a subject through online credit recovery when they fall behind, and providing a rigorous, interactive learning model. Online learning is providing the content and integration of digital tools for portable and mobile learning opportunities." - iNACOL 

Your task is to assume the role of an online course developer and create a screencast using the Educreations app for our online course resources.  The Screencast Tutorial that follows details your task and provides information on how to use the app.  You will upload your completed project via the submission form posted.  


Tutorial:


Rubric:

Rubric


I am thrilled to be participating in #Made4Math.  It is just the motivation I needed to keep me focused and productive this summer:)

Friday, July 20, 2012

Fabulous Finds Friday: Interactive Studnt Notebook

Last week's Fabulous Finds Friday helped keep me organized.  This week's favorite find focuses on keeping students on track.  The Interactive Student Notebook was a new find for me this summer.  Interactive "Notebooks are a tool to strengthen student learning of curriculum through increased student participation.  They are used in class daily to help the student learn and keep track of their learning.  This style of notebook uses both the right and left-brain hemispheres to help sort, categorize and be creative with the newly attained knowledge." - MyMathClass From what I have read, they can be used in any subject and any grade.  One side of the notebook is more teacher directed (class notes, examples, etc.) and the other side of the notebook is more student centered with lots of illustrations, reflections, and evidence of student processing. There seems to be many approaches to organizing the notebooks, but I liked the common idea of including student reflection and using graphics to illustrate main ideas in students' notebooks.  While I may not incorporate the whole ISN idea, I am challenged to find a few foldables that can be incorporated this semester.  I hate to admit it, but it has been a while since I have included these hands-on creations that allow students to organize, display, and arrange information, so I did a quick search and found tons of ideas online.
Another great idea came from Tammy author of Forever in First via Pinterest.  Her idea...take pictures of students' ,math strategies, name them after the students who invented them, and display them in the classroom.  I love this idea because it cultivates ownership of the content by everyone in the room!


I am always looking to learn, especially during the summer and definitely from the comfort of my own kitchen table.  Leave it to Discovery Education to fill that need for me this summer.  This just announced...Discovery Education Summer Institute will be broadcast live during the week of July 23 - 26.  As one who has attended, this is an event you won't want to miss!  From the posted schedule, I see one of my favorite presenters to hear, Hall Davidson, will be  talking about one of my favorite technologies, iPads!!!  I guess I know where I will be on Monday the 23rd at 11:10am :)  On Tuesday, Patti Duncan will be discussing notebooks and journals in the media rich classroom.  As a member of the Discovery Educator Network, I have had the privilege of attending several DE events, all are inspiring.


This week I have also found many inspiring new friends' via the #Made4Math Challenge that I had to include them in my list for Fabulous Finds Friday.  All are great and generously share classroom ideas through Twitter and personal blogging.  Listed are the links:
@druinok - Teaching Statistics
@roitzc - Math in the Middle
@gwaddellnvhs - Success: A teacher looking for classroom success
@ScottKeltner - Large Scale Printing for Probability
@Wyldbirman - Hands on Math in High School
@merryfwilliams -  Dividing by Zero
@fouss - My Web 2.0 Journey
@jreulbach - I Speak Math
@pamjwilson - The Radical Rational...
@mathtastrophe - Mathtastrophe
@LaurenDeReche - From a Math Class
@fourkatie - Axis of Reflection
@reminoodle - The Mathsmith
@MarshaFoshee - Math-termind
@approx_normal - Approximately Normal (in the classroom)
@elhodge - Teaching Creatively
@MsKLaster - No Limits on Learning!
@bowmanimal - Bowman in Arabia
@sandramiller_tx - Take it to the Limit
Sarah - Alwilda's Daughter
@misscalcul8 - Misscalcul8
@fawnpnguyen - Middle School Math Teacher Learning on the Job

"How-to" Guide

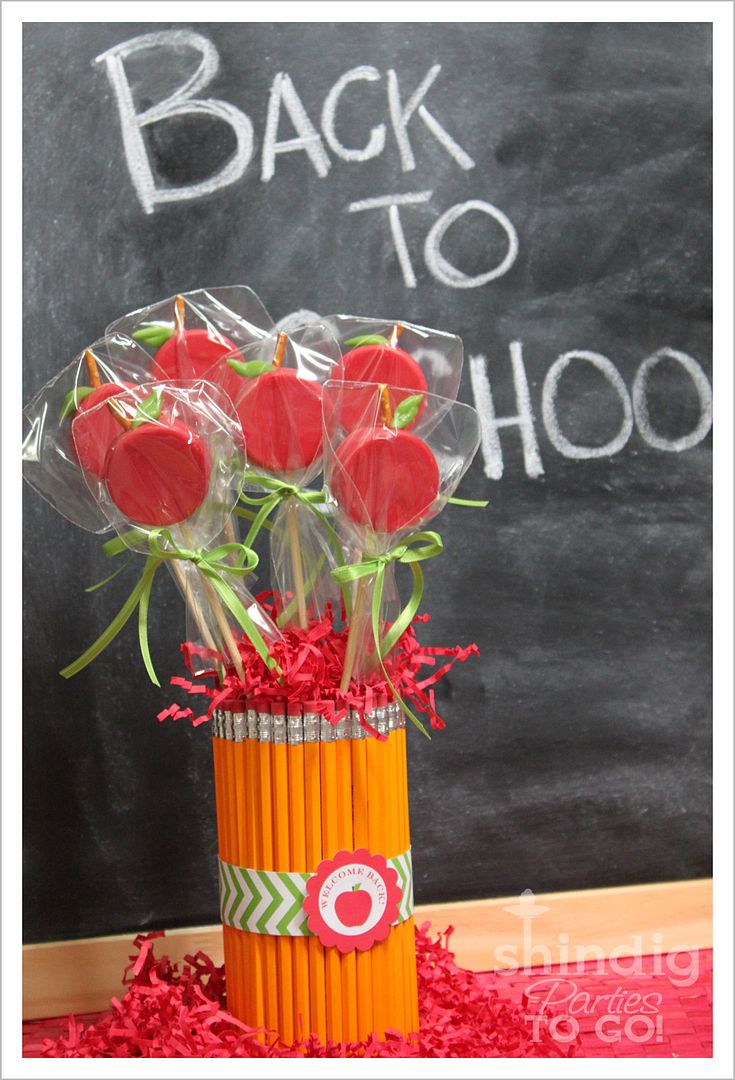
Lastly, something just for fun... how adorable is this!!! I think I will try to find red lollipops instead of hand dipping oreos. Maybe school colors: blue pencils and red suckers with school logo in the middle... or maybe more polka dots!  Just a thought.  Wishing you a wonderful weekend!  Thanks for stopping by:)

Monday, July 16, 2012

Made 4 Math Monday: Great Graphing Marathon and B-day Happies


Happy #Made4Math Monday!  This is week 2 for me and I am so excited about this week's math project that I actually started it LAST Monday:)  A few weeks ago, I generated a list of ideas for active lessons (in anticipation of moving to block next year).  At the time, I had become a bit obsessed over SuPER sizing activities, thus the Great Graphing Marathon was conceived.

Let me first say that my students are not huge fans of plotting points, translating parent functions, or graphing in general.  So, I knew I needed to make it more fun to reinforce and practice graphing.   I thought, "How much more FuN can it get to be TrAnsForMed into "MaRatHon MenTaLity" as we create life size graphs with the students as the ordered pairs?!?" In this activity, students will be given a race number when they enter the room and safety pins to adhere the numbers to the backs of their shirts (my friend CM would say my inner elementary teacher is showing again :) *Correction: numbers on which they can work the problems to be graphed on the back of the print out.
I will mark off a Cartesian plane with masking tape in our cafeteria (or chalk in the parking lot).  I have made up various functions that they will need to graph (quadratic, absolute value, and radicals, but anything would work) and I will show just one function at a time.  Students will plug their race number into the function and then graph themselves on the giant coordinate plane.  I realize some of the values will get pretty big and we will need to adjust how we count the marked squares. 
Click for Complete File
In the spirit of #Made4Math Monday, I have created and printed both the race numbers and the functionsgathered my safety pins, and will make medals to hand out after the Marathon. Fingers crossed that they will like it!

It felt so good to get Project #1 done, I whipped up a second project: birthday happies.  For me, students' birthdays can be stressful, in that, I always find myself scrambling around trying to figure out something cute to give each one.  I do really great through September and then, I fall prey to the busy-ness of work and the rest of the kids get nada (which makes it look like I only like the August and September kids :/ ) Project #2 solved the problem.  They are all getting pop rocks.    Here's what I came up with...
First, a trip to the dollar store (Note: They don't take Mastercard, but they gladly accept buckets of change.)

Cut colored tissue paper into thirds.

Wrap each pop rock package in the tissue paper and secure paper with tape.  I found the dark colored packaging on the pop rocks showed through the yellow tissue paper.  So, I ended up using two pieces for the yellow packages.


Wrap a piece of black card stock around the package and then wrap the birthday printable (made using Microsoft Office Publisher) on top of the card stock.  I cut out a black paper starburst and the word "ROCKS" and hot glued it to the front of the wrapper.  Now, no more BirThDay ScRamBLe!  
  

Friday, July 13, 2012

Fabulous Finds Friday: Teacher Binder

I love summer!  The sun on my nose.  Popsicles in the frig, hours to spend surfing the web and ambition to re-create what you see :D  This week, I found an organizational idea to incorporate into my class this Fall.  First, let me say I am a binder girl.  There was a time when my whole life was filed in one binder after another.  I somehow migrated away from the binders and I have never felt quite as "together".  So, when I saw this Teacher Binder, I was InSPiRed to make one too!  The binder includes sections for calendars, meetings notes, and lesson plans.   I am not quite finished putting it together, but I do have the calendarsweek-at-a-glance, and section dividers ready to share.
Click to Download
Click to Download

Click to Download
Hope you like polka dots!

Monday, July 9, 2012

Made 4 Math Monday: Welcome Podcast

I stumbled upon a post on 4th Grade Frolics by Tara inviting others to a Linky Party for Made it Monday in which participants would share classroom ideas and stay focused and productive this summer.  She and other elementary teachers had a wealth of adorable ideas.  Some, I could adapt into high school math, others were a stretch.  I knew I wanted to find a similar summer challenge of sorts for high school teachers... so, of course, I googled it:)  One of the top hits was a Made 4 Math Monday BLOG Party (and guess what I teach!!!) It actually started just last week.  It turns out that @pamjwilson and @druinok had seen Tara's post too! 
Free & Easy Podcasting
Created @ GoAnimate!
While I usually skew to the very arts and crafts side if given the opportunity, today I wanted to work on a "Welcome Podcast" for my new classroom website.   I used Cinch to record my message and Go Animate! to create an avatar (totally optional).  I uploaded a picture and attached my podcast link to it and... Voila! my WeLcoME PoDcasT is ready for the new school year:)


To actually do the WeLcoME PoDcasT:


I downloaded the Cinch app to my iPhone.


Created an account.


Plugged in the little white Apple headphones with mic that came with my phone.


Pushed record.  It was that EZ!!!
  

Thanks Pam for hosting the #Made4Math Blog Party.  It was just the motivation I needed!

Sunday, July 8, 2012

Project Snapguide: Making a Math Tutorial

Snapguide App
Did I tell you the iPads are coming?  It is official!  Our IT director and administration blessed the 1:1 iPad initiative for the 2012-2013 school year:D  So, I am busy this summer revamping lessons to include the NeW, BEaUTiFul, ShiNy, Oh-sO-PoWerFuL technology.  While I am not usually a "project" kind of girl, I have defined several activities I would like for students to complete and for lack of better terminology, I am calling the activities "projects".   I am busy defining the tasks, creating tutorials, and making rubrics to go with each one.

I have just completed an assignment in which students will use the Snapguide app to create a math tutorial for an assigned problem type.  Here is what I came up with:
Task:  According to a Harris Interactive poll in the Spring of 2012, three in ten Americans own an e-reader. With the rise of Nooks, Kindles, and iPads, large textbook companies are moving quickly to electronic versions of content specific e-books.  This is causing Educational Content Writers to adjust how they communicate information.

Your task is to assume the role of a 21st century content writer and create an easy to understand Math Tutorial using the Snapguide app for the Textbook of Tomorrow.  The tutorial that follows details your task and provides a step-by-step tutorial on how to use Snapguide.  You will upload your completed project via the submission form posted on the class website. 

                   Tutorial: 
Click here to see tutorial

                    Rubric: 
    
                 Click here to view
I'll post all three project components on the class website and provide a place for the students to upload the projects.  I have the rubric scored for possible points being 5, 3, or 1 for each category.  Is it okay to score like this (counting by 2's)?  This is my first project in FoREvEr and of course, I am hoping they ALL make 20 out of 20.  So, please provide feedback, especially if you see that I am forgetting something important for their success!

Friday, July 6, 2012

Fabulous Finds Friday: Electronic Lesson Plans, Interactive Bulletin Boards, and More

With summer officially here (my last day for the school year was Tuesday), I have found myself surfing the web looking for fresh ideas and fabulous finds to make next year's teaching and learning even better.  I have found so many amazing resources shared by educators from around the globe.  I thought I would share a few of them here in a Fabulous Finds Friday post (I confess, I have been searching for a theme:)


My first incredible discovery is Janet Benincosa's fabulous website filled with numerous resources including technology resources, curriculum maps, and electronic lesson plans (which I had never seen and thought how easy it would be to customize for my state standards).  The electronic lesson plan allows the user to utilize a built-in drop down menu to choose standards, level of Bloom's, Marzano's strategies, modifications, and so much more!  


Kutztown University's Methods of Teaching Secondary Mathematics class has shared many ideas for interactive bulletin boards.  Photos, directions, and lesson integration are all available on their website.  Though the bulletin boards were designed with specific topics in mind, they can be easily adapted to fit any mathematics concept. 


via Pinterest
This teacher makes 5 New Student Packets in which she an extra of everything at the beginning of the school year.  When a new student comes in midyear, all of the first day items are handy and in one place.  I will definitely be doing this!  


Erin Eberhart shared a tip for creating Running Records using address labels, clipboard, and a pen. She makes notes on the address labels as she observes students.  For example, John is struggling with... At the end of the week, she places the address labels on the large index card she keeps for each student.  It makes it easy to keep track of each student's progress and share observations with parents. 


Birthday Treats
Classroom Happies

Finally, two fun things to make for my sweet students.  I love the erasers; they remind me of salt water taffy and the fair the way they are all wrapped up.  And then, the birthday Pixie Stix... which was from Success in Second Grade and though I teach students 10 grades higher, I still think they might like this birthday treat:D

Wishing you a great weekend.  I am off to discover more FaBULoUs FiNds!